Step Up Authentication adds a cryptographic signature layer to high-value transactions in the Paxos Dashboard. When enabled on an approval rule, designated approvers must cryptographically sign each request before it is processed.Documentation Index
Fetch the complete documentation index at: https://paxos-0ac97319-feat-managed-transfer-preview.mintlify.app/llms.txt
Use this file to discover all available pages before exploring further.
Looking for API-level request signing? See Request Signing.
Step Up Authentication applies only to Dashboard-originated withdrawals and conversion instructions. API calls are unaffected. Approvers must have a Verified key before they can sign. If an approver has not completed key verification, they will be unable to sign and any transaction requiring their signature will remain pending.
Setting up your approval key
Each approver must create an approval key before they can sign transaction requests. This is a one-time setup. If you are assigned as an approver on a rule that requires step up authentication and have not yet set up a key, a banner appears at the top of your Dashboard with a direct link to key setup.➊ Navigate to Security
Go to your profile settings in the bottom-left corner of the Dashboard and select Settings, then Security.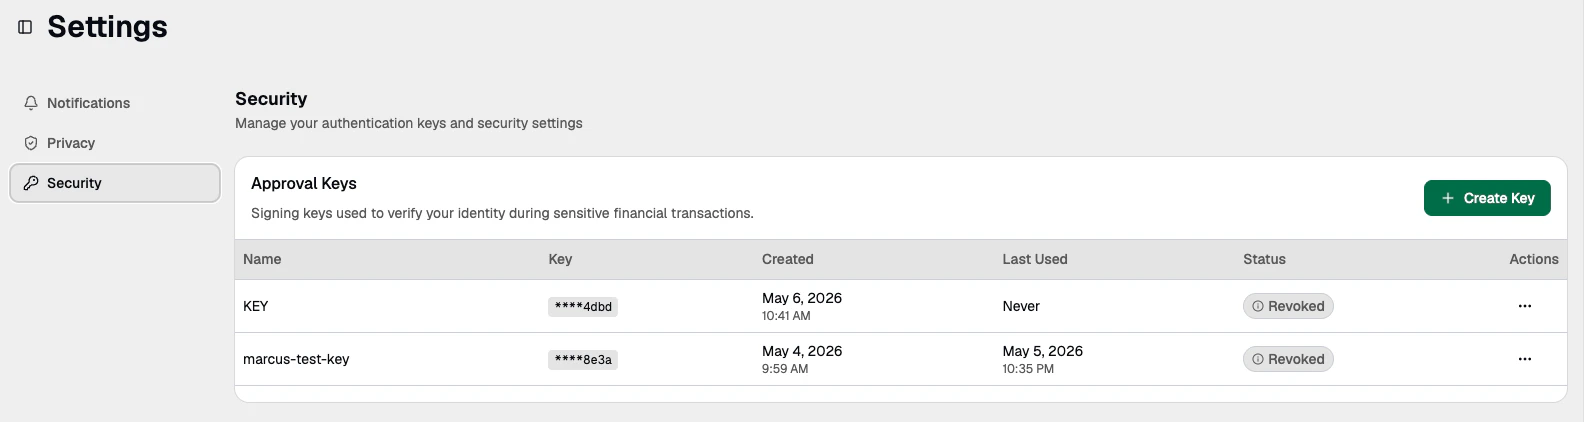
➋ Create a key
Under Request Signing Keys, click Create Key. Enter a display name — something you will recognize (e.g., “Laura - Primary Key”) — then click Create Key. A popup window appears.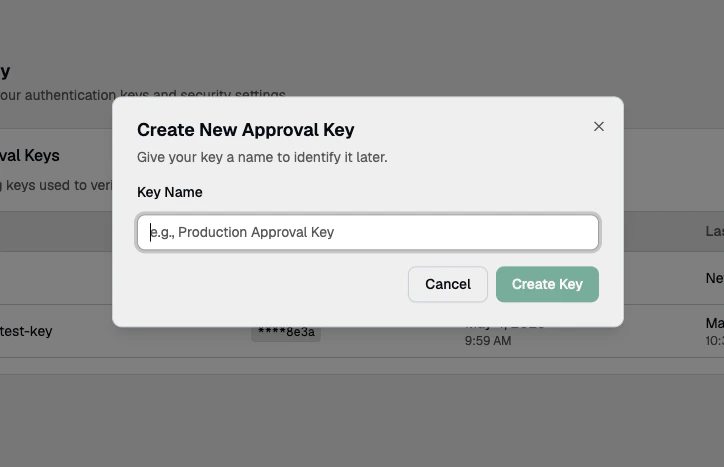
➌ Register with your credential manager
The popup prompts you to register using your credential manager or biometric (e.g., fingerprint, Face ID). Complete the authentication step.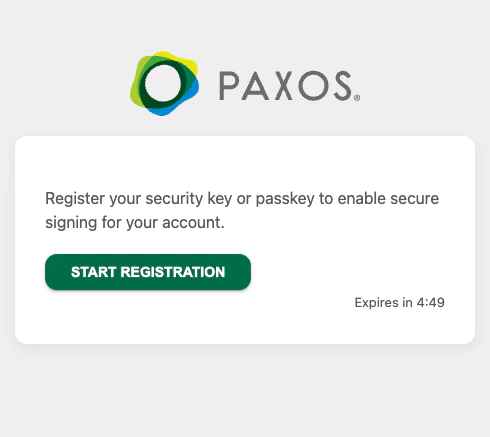
➍ Save your verification code
After successful registration, the popup displays your 16-character verification code. Click the Copy button to copy the code. Save this code somewhere safe — you will need it for the verification step. If you lose it, you will not be able to verify your key and will need to create a new one.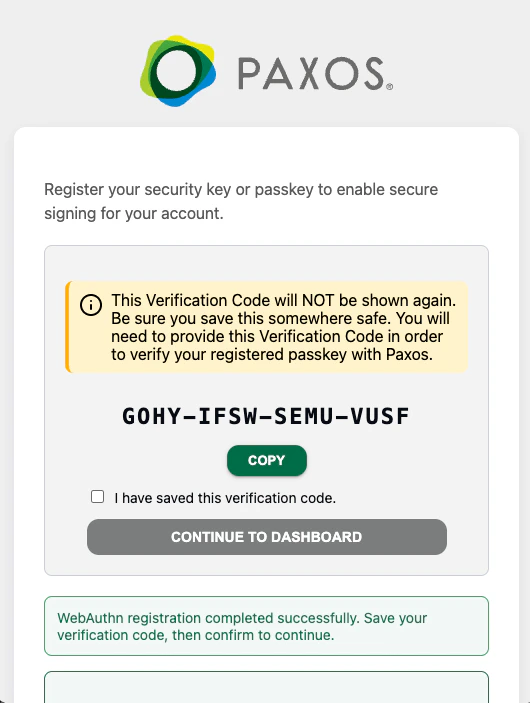
Your 16-character verification code is derived from your public key. While it is not sensitive, you will need to provide it to Paxos Operations to complete the key verification process. If you lose it, you will need to create a new key.
Verifying your key
After creating your key, it must be verified by Paxos before it can be used. Verification is an out-of-band process handled by the Paxos Operations team.➊ Submit a verification request
Complete the Step Up Authentication form and include:- Your 16-character verification code
- The display name of your key
➋ Wait for confirmation
Paxos Operations will look up your key, verify it, and coordinate deployment. Verification is typically completed within five business days. You can track your key status in the Security section of your Dashboard.Enabling step up authentication on approval rules
Administrators can enable step up authentication on withdrawal, transfer, and automation approval rules. When enabled, every transaction matching that rule requires cryptographic signatures from the designated approvers.➊ Navigate to Approvals
Go to Admin > Approvals and click Edit on a withdrawal, transfer, or conversion rule.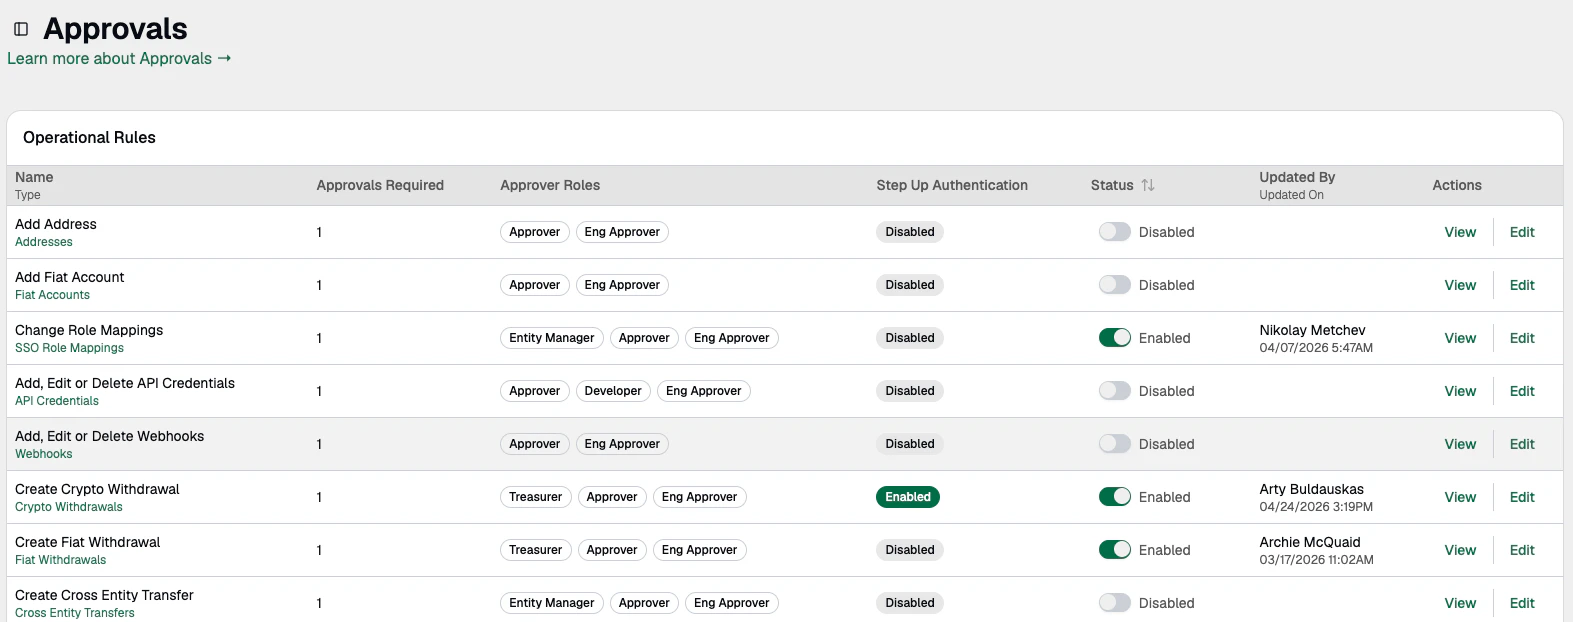
➋ Enable step up authentication
Select the Enable Step Up Authentication checkbox. Set the number of required approvals (1 to 3) — each approval requires a distinct signature from a different approver.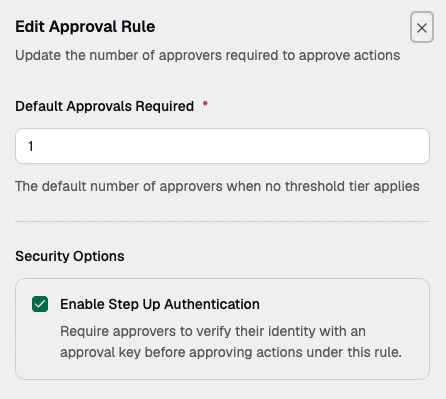
➌ Save the rule
Once saved, the Operational Rules table displays a signing indicator next to rules that require step up authentication. Administrators can disable it at any time by editing the rule and unchecking the checkbox.Approving and signing a request
When a transaction requiring signing is submitted, designated approvers are notified both in-app and via email and must complete a cryptographic signing step in addition to the standard approval.➊ Open the pending request
You will receive a notification in your Dashboard. The request also appears in the pending approvals list on the relevant page (e.g. Transactions, Automations, Crypto Addresses). Click Review on the pending request to see the details.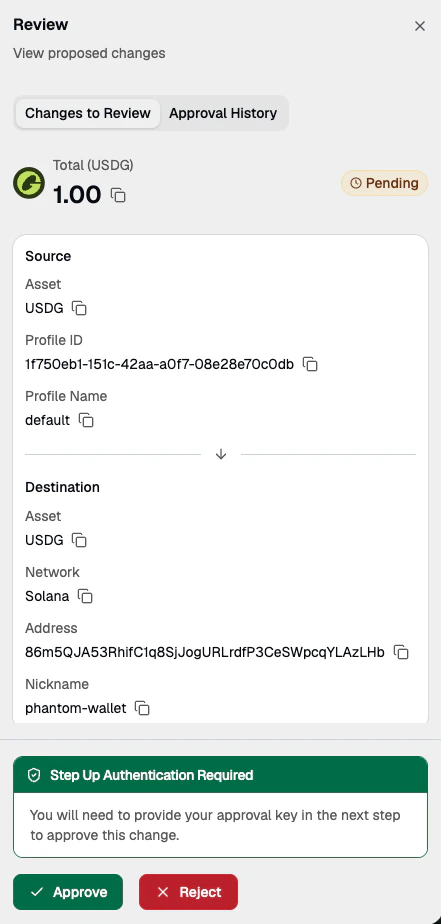
➋ Sign the request
Click Approve, then click the signing link. A separate popup opens on a secure domain (https://paxos-secure.com). Complete the signing process in the popup.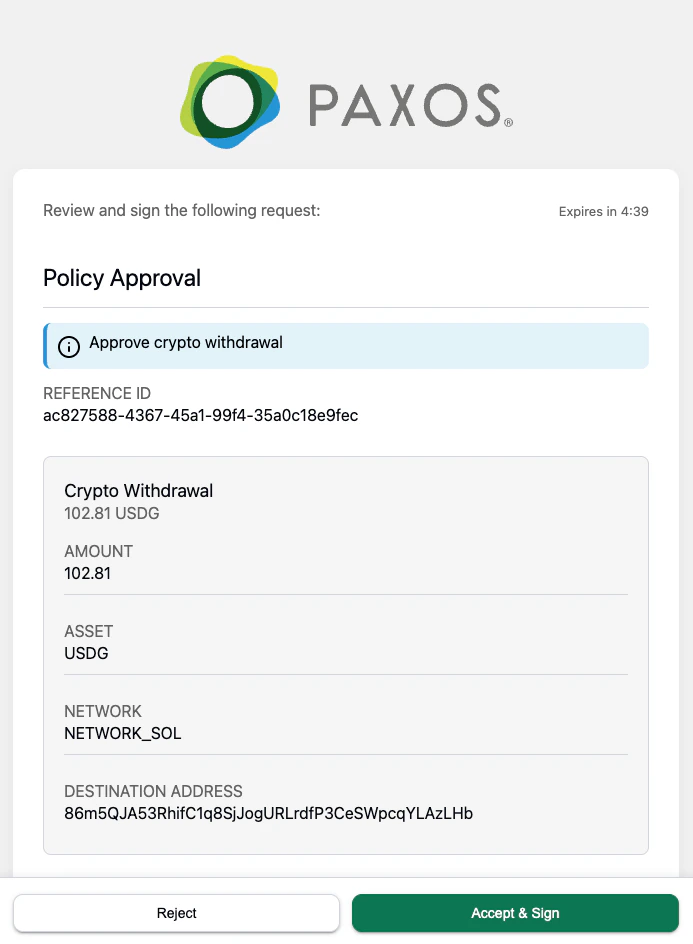
The secure signing window runs on a separate domain from the Dashboard. This is by design and ensures the signing process is isolated for security purposes.
➌ Confirm
After signing, return to the Dashboard. A confirmation screen confirms the request has been approved and it disappears from your notifications. When multiple approvers are required, after signing you will see a message such as “Your signature has been recorded. 1 more signature required.” The request remains visible to other approvers until all required signatures are collected.Revoking a key
If you need to retire an approval key — for example, if you have lost access to your credential manager or believe your device is compromised — you can revoke it at any time.➊ Navigate to Security
Go to your profile settings in the bottom-left corner of the Dashboard and select Settings, then Security.➋ Revoke the key
Under Request Signing Keys, find the key you want to remove and click Actions > Revoke Key.Viewing signed requests
Signed transactions and conversion automations display a shield badge in the Transactions and Automations table views. Transactions approved without signing do not show this indicator.
- The name of each person who signed the request
- The date and time each signature was recorded
Frequently asked questions
What is the difference between Step Up Authentication and Request Signing?
What is the difference between Step Up Authentication and Request Signing?
These are two separate features that serve different purposes:
- Step Up Authentication (this page) is a Dashboard feature. It requires human approvers to cryptographically sign high-value transactions — such as crypto withdrawals, cross-entity transfers, and conversions — using a WebAuthn credential (e.g., fingerprint, Face ID, or a password manager). It is part of the Dashboard approval workflow.
- Request Signing is an API feature. It allows your backend services to sign outbound API requests using asymmetric cryptography (JWS), so Paxos can verify the request came from your system. It is unrelated to the Dashboard.
I lost my 16-character verification code. What should I do?
I lost my 16-character verification code. What should I do?
Revoke the key it was associated with and create a new one. Navigate to Security > Request Signing Keys > Actions > Revoke Key, then create a new key and complete a new Step Up Authentication form with your updated verification code.
Can I have more than one approval key?
Can I have more than one approval key?
You can, but you typically only need one. A single key works across all your entities within your organization.
What credential managers are supported?
What credential managers are supported?
Approval key registration works with any WebAuthn-compatible credential manager, including 1Password, Google Password Manager, and built-in biometric systems (fingerprint, Face ID). The experience may vary depending on which manager you use.
What happens if I try to sign a request but I do not have a key set up?
What happens if I try to sign a request but I do not have a key set up?
You will not be able to complete the signing process and therefore cannot approve the transaction. If you are assigned as an approver on a signing-required rule, set up your key in advance. A banner on your Dashboard will remind you if you have not done so.
Can I disable step up authentication once it is enabled?
Can I disable step up authentication once it is enabled?
Yes. Your Dashboard Administrator can edit the approval rule and uncheck the step up authentication checkbox at any time. Transactions submitted after the change follow the updated rule.